Sunday, March 3, 2013

How to Peel Shriveled Potatoes

I was at the York County Beekeeper's meeting last week (More about bees in forthcoming posts.) when the speaker remarked that for bees, March is the starving month. (Bees tend to run out of food right about now, just when they're starting to become more active.)

It made me think about our ancestors; March must have been their starving month, too. They survived on whatever they had preserved of their harvest. After a winter of eating from their stores, certain items would start to run out.

As I inventory our pantry, cold cellar, and freezer, I can see how our supplies are starting to dwindle. We still have plenty to get us through 'til the greens start producing, but the applesauce is nearly gone, there's only two or three chickens left, onions are long gone, we're down to three sweet potatoes. And a box of shriveled little potatoes, no bigger than a large chicken egg.

I despise peeling potatoes, and I really, really, really (getting the picture?) despise trying to peel small potatoes, let alone shriveled ones. For this very reason I sort my harvest of spuds into categories. Peelers (large and med/large), tiny ones that we eat whole, and everything else. I will begrudgingly peel those large ones, which seem to run out way too quickly. By winter's end we're down to the everything else category, which we mostly just dice and use for Saturday breakfasts, fried with eggs.

But my family also loves them mashed and for that they must be peeled. (According to our preference). Much to my joy and thankfulness, I discovered a quick and easy method for peeling those last wrinkled little potatoes hiding in the cold cellar.

It's just like peeling all those tomatoes piled up for summer canning.
Just three very basic steps:

1. Boil the potatoes in salted water for a short period.

2. Dunk them in ice water to cool.

3. Peel. 


How incredibly awesome is that?


Wednesday, February 20, 2013

Waldorf Sixth Grade Geometry

From "Compass Drawings"

I know I say this about every block we study, but we have loved geometry. The Waldorf approach is so appealing, and gentle. The Boy and I both have benefited from the lovely way geometry is taught in the Waldorf curriculum.  We both gained a little confidence and were able to immerse ourselves in creating beautiful, orderly, shapes.

From "Compass Drawings"
Last year we spent time exploring geometry through form drawings, practicing various patterns of lines, circles, and squares, but all free hand. This year we broke out the compasses, rulers, and protractors to make our shapes more mathematically accurate.

Main Lesson Book Polygons, Circles

We learned how to measure radius, circumference, diameter, perimeter, and area. We learned how to divide a circle in halves, quarters, and in sixths, eighths, twelfths on up to 24ths. We created spirals, hexagons, octagons, squares, and stars. We learned about angles, intersecting lines, parallels, and perpendiculars. And the Boy spent quite a bit of time just experimenting with the compass and ruler. He would often ask if he could make up his own designs. I was happy to oblige, it's not often that I see such enthusiasm for "work" from him.
From "Making Math Meaningful"

 The main resources I used were "String, Straightedge, And Shadow, The Story of Geometry" by Julia Diggins, "Making Math Meaningful," Jamie York Press, and "Compass Drawings," Enasco.


I also picked up a few workbooks from a yard sale to use for concept practice (measuring area, perimeter, and determining radius, diameter, and circumference, etc) We don't typically use worksheets, so they're kind of a treat for the Boy. Yes, he likes worksheets!

Besides using our compasses and rulers, we also crocheted shapes. I found a great book, "Beyond the Square Crochet Motifs" at our local library. Choosing a pattern, I would begin, then would give verbal instruction to the Boy.(Single chain x amount,etc.) After a few rounds, he would begin to notice a pattern. We continued our crocheting until he would eventually start to verbalize the steps to the pattern. Then I knew he "got it." Not only in his head, but in his hands as well.

Patterns From "Beyond the Square"
We used paints, colored pencil, and chalk pastel to color our work. And we enjoyed it so much that the Boy has asked if we could continue with our compass drawings. 

We are moving on to our next block, Greek History, but I'll still throw in a compass drawing now and then.


Sunday, February 17, 2013

Replacing Plastic Wrap: One More Use for Beeswax


Recently, as I wrestled with a stupid roll of plastic wrap (I know, plastic wrap can't be stupid, but you know what I mean. It refuses to tear on the little metal thingy in the box,unlike your fingers which shred to ribbons. Then the darn stuff won't stick to anything but itself eventually becoming a useless wad of plastic.) During this current wrestling match, I caught myself thinking, "What would my great grandmother have used?" She certainly didn't have plastic wrap back then. Maybe oilcloth? (I don't even know if you can get oilcloth anymore. Kind of sounds gross, anyway. ) What did my grandmother use? My mom never used plastic wrap. She always used waxed paper, much to my embarrassment. "Mom! everyone uses baggies!" Mom did not care what everyone else used.

We mostly use reusable containers, some plastic, although I'm working toward replacing those with glass. But some things don't require a container, they just need a wrap. While I sometimes use baggies, it irks my conscience. Waxed paper seems a better choice, but it's still another piece of trash to throw in the landfill. What else could I do?

So I thought and thought and decided to try making waxed cloth, instead of paper.

Here, in brief, is what I did:
  1. I washed (in soap, not detergent) an old cotton pillowcase, and let air dry
  2. Using pinking shears, I cut out two pieces (it was a small pillowcase) and trimmed each to fit a rimmed cookie sheet. I placed one cloth on each cookie sheet.
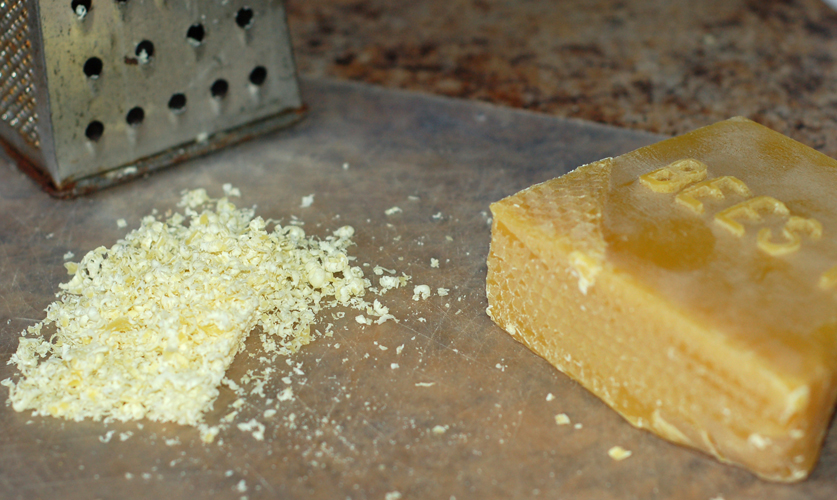
  3. I grated some beeswax, then sprinkled it over the cloth, making sure to evenly distribute, all the way to the edges. I used about a 1/4 cup of grated wax per cloth.
  4. I popped it in the oven for a minute or two (set at 300 degrees) til the wax was all melted
  5.  Let it cool
finished cloth, cooling

And it works! I've used them to wrap blocks of cheese and to place over containers. It doesn't seal like plastic wrap is supposed to, but if you warm in a bit in your hands, you can shape it nicely. I also have rubber bands (recycled!) that I'll snap around the rim of a container just to hold the cloth in place.

It does a pretty good job and it makes me happy every time I pull a cloth wrapped bundle from the fridge. It's not made of petroleum products, nor does it have lots of waste packaging. They can be wiped off, or rinsed in cool water. And no nasty serrated metal thingies so I can keep my fingers intact. It's all good.

Beeswax cloth bowl cover